All in One Wp Migration Increase Upload Limit Plugin 128mb
All-in-One WP Migration is an crawly and powerful plugin for WordPress, especially for WordPress Developer. Today I will show y'all how to remove the 512 MB upload limit for All-in-I WP Migration Plugin and increase it to unlimited.
Total and working All in One WP Migration plugin has been hosted in GitHub. Yous can download the working half dozen.77 version from this link, where the uploading limit has been fixed.
Earlier going to the step-by-step mode to solve All-in-I WP Migration Plugin Upload Size Limit Problem, let's come across the issue showtime. If you are familiar with WordPress or working on WordPress as a developer similar me, you might need to transfer a site from one hosting to some other hosting or local development to a live server.
There are so many plugins is available to migrate WordPress sites from one hosting to another hosting. Here are the eight Best WordPress Migration Plugins:
- WordPress Duplicator
- BackupBuddy
- All-in-Ane WP Migration
- UpdraftPlus WordPress Fill-in Plugin
- WP Drift DB
- VaultPress
- Drift Guru
- WP Clone
I already used almost all of the migration plugins mentioned higher up. Though I used my own developed migration plugin most of the fourth dimension, if I go with other solutions, then All-in-One WP Migration is my kickoff choice to transfer or migrate the WordPress site.
Now let'southward be clear why this post has been written? If yous are a regular user of All-in-One WP Migration, then I am sure that you confront an Upload Size limit issue. Even if your Net connection is slow like mine, y'all volition confront bigger issues to restore the fill-in, which is bigger than 512 MB to 600 MB.
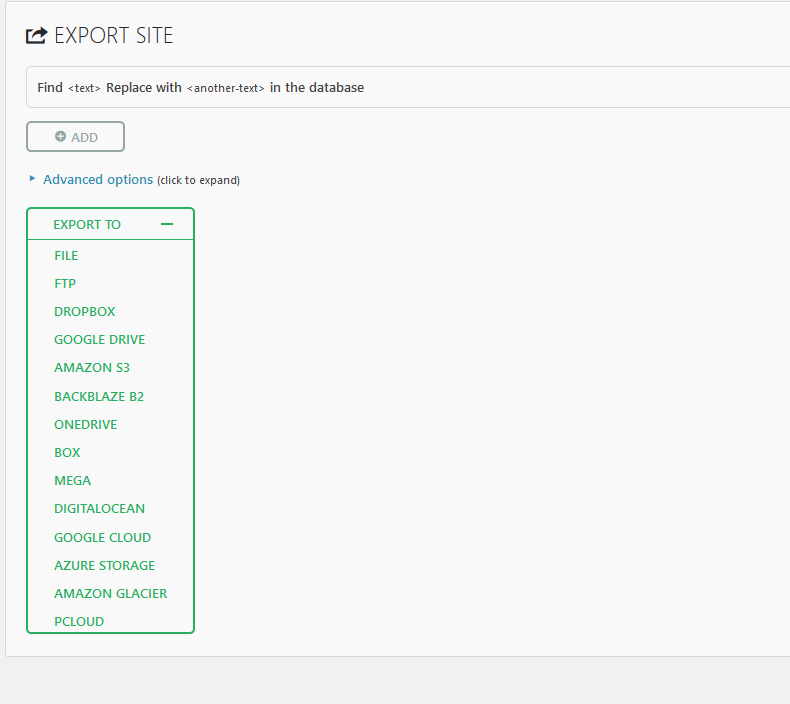
All-in-One WP Migration has a total of three options:
- Export
- Import
- Backups
Yous tin export the whole website fill-in in any way, such as direct download, store in Dropbox, Google Bulldoze, etc. You lot volition as well get the same options while you lot volition import the backup.
Yous can export and download any file size, does non matter it is 512 MB or 2 GB. You will face an upload size limit issue only once you lot try to upload a fill-in file of more than than 512 MB. Because by default, All-in-1 WP Migration allows importing a maximum of 512 MB backups.
How to increment the upload size limit of All-in-Ane WP Migration in an easy way step past step
At that place are two ways to increase the Upload size limit of the All-in-1 WP Migration plugin:
- Editing htaccess file
- Editing plugin core files
First, let's learn to increase the upload size limit of All-in-One WP Migration using htaccess.
Increment upload size using htaccess
As per the All-in-One WP Migration plugin writer help guide, you tin increase the upload size limit by adding a few line codes in the .htaccess file. If you lot follow this way, and so you must take root access to the website. Here is the stride by step guide on increasing the upload size limit of WordPress as well every bit the All-in-I WP Migration plugin:
i. Commencement, login into your CPanel or hosting panel.
2. At present click on File Manager to open website root. Note that you must demand to enable evidence subconscious files in the file manager.
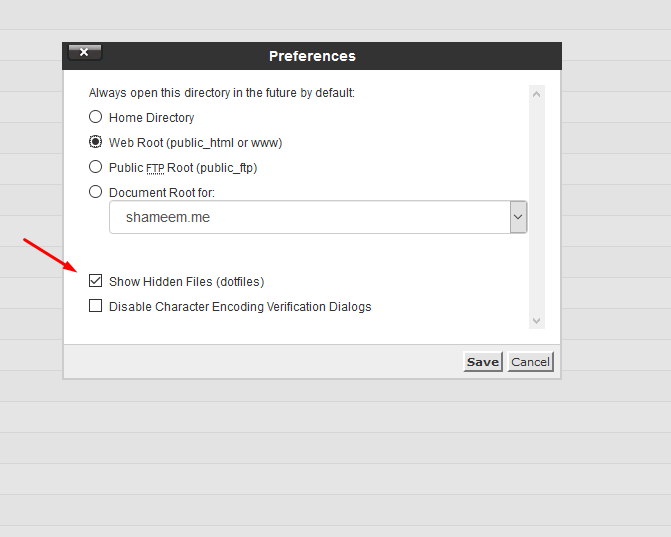
iii. Once yous enable show hidden files options, you will meet the .htaccess file in the file listing. You lot demand to option .htaccess file on the editor as shown in bellow epitome.
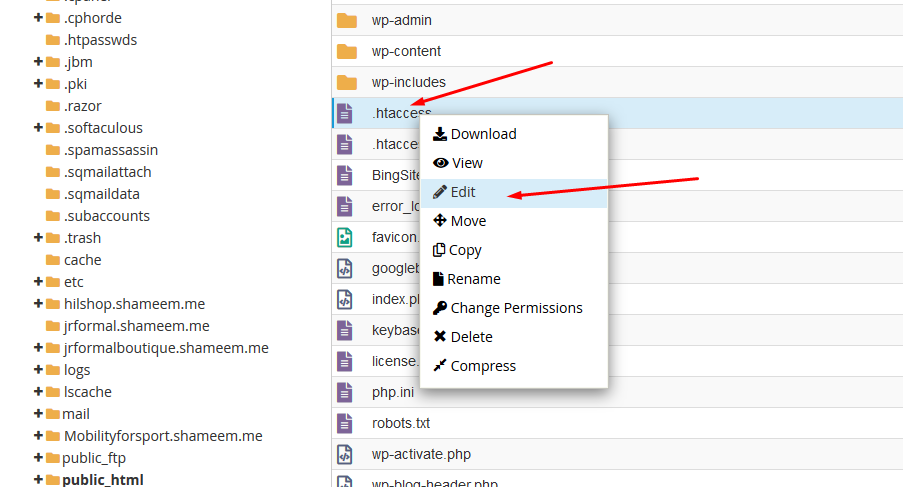
4. Now re-create the below codes and paste them at the bottom of your .htaccess file. Make certain you lot click on the Salve button.
That'due south it. If you go to import options of the All-in-One WP Migration plugin, y'all will meet that your Upload size limit has been increased.
Increment Upload Size limit of All-in-1 WP Migration by editing code
Using the htaccess method, you can increase the upload limit of All-in-1 WP Migration easily. Actually, this solution is best if your Net speed and hosting are really good. But if y'all are like me, using shared hosting and a slow internet connection, you might need to use All-in-Ane WP Migration; other options are chosen Fill-in Restore.
But in All-in-One WP Migration Backup choice likewise has an upload limit issue. At present I will show you how to increase the Upload size limit in All-in-One WP Migration backup restore options.
Stride past stride guide on increasing the upload size limit of All-in-One WP Migration:
You need to follow 7 easy steps to increase the upload size limit to restore the backup:
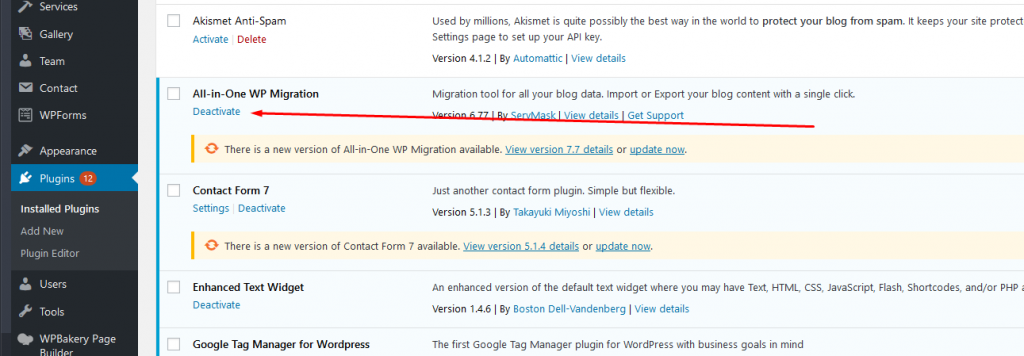
- Start Install and Activate Plugin
- After then Open Plugin Editor
- Select All-in-1 WP Migration Plugin
- Now select Constants.php File top Open on Editor
- Edit Constants.php File to increment the upload size limit
- Click on Save Changes
- Check the Settings
Too, you need to utilize an old version of All-in-One WP Migration plugins to do it.
Stride 1: I am assuming that you already installed and activated the All-in-Ane WP Migration plugin.
I take to mention that you lot need to use the All-in-One WP Migration plugin version 6.77 to restore any size of backup files. The plugin author has been removed the former version from the WordPress plugin repository. But don't worry, you can download the All-in-One WP Migration 6.77 version from here (GitHub).
Download All in All WP Migration 6.77
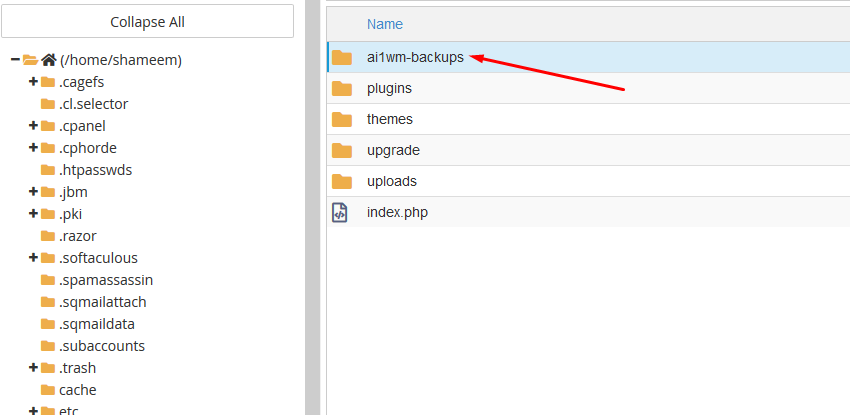
To restore a bigger file, you have to start upload your fill-in files in the ai1wm-backups folder, which you lot will detect inside the wp-content folder.
Once you uploaded your backup files in the ai1wm-backups folder, you lot need to go All-in-Ane WP Migration plugin Backup options. If you lot uploaded your backup files properly, you would see a fill-in list nether All-in-One WP Migration backup options. You need to click on the restore push button to import the backup.
But if you are using the latest version of the All-in-I WP Migration plugin, then you will see an upload size limit error as shown below image:
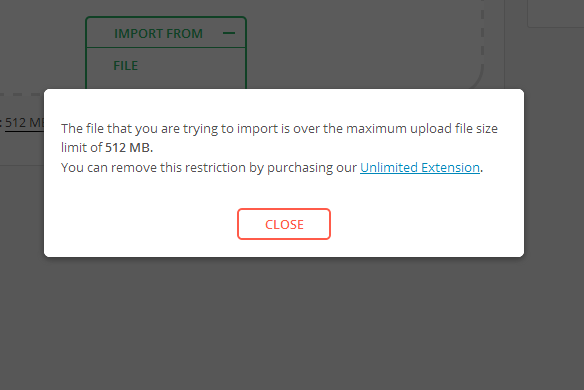
If y'all accept money, you lot may purchase their premium addons to increase the upload size limit. And if you don't desire to buy premium addons, permit'due south become to the second pace.
STEP 2: Equally mentioned before, you need to remove the All-in-One WP Migration latest version and install the old version, which is 6.77
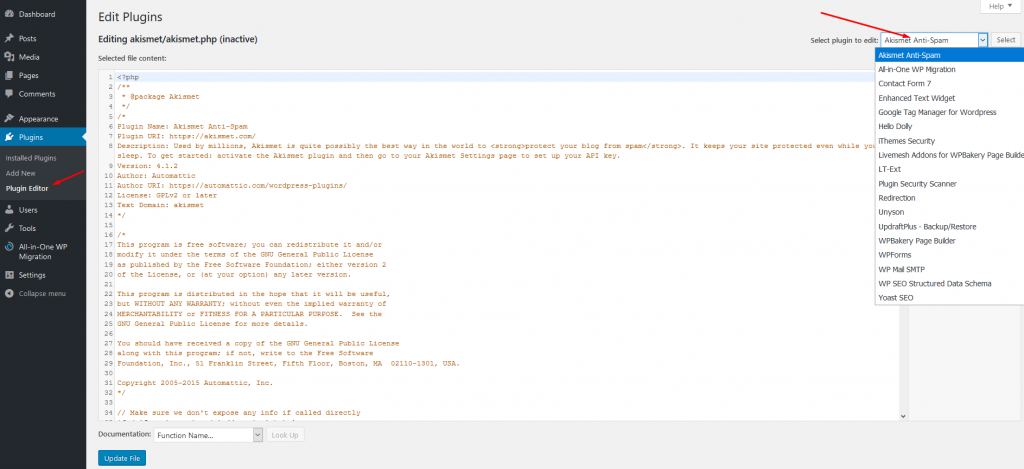
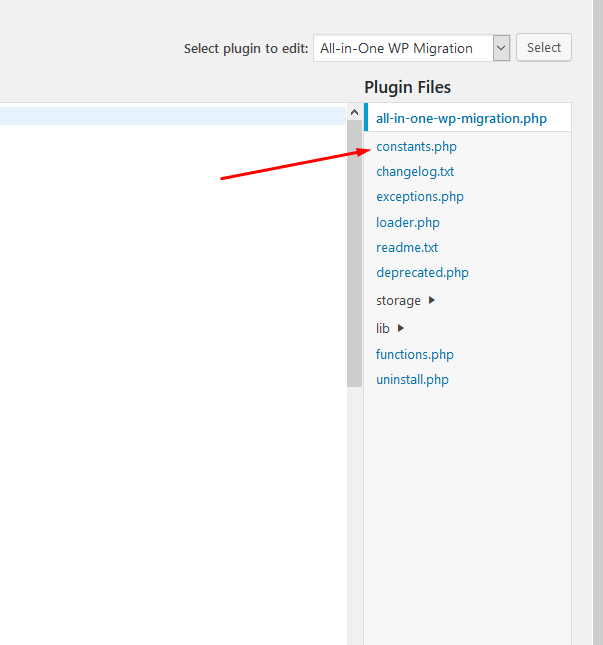
Pace three: Now get to Plugins => Editor and select All-in-One WP Migration every bit shown above. Once the plugin is loaded in the editor, click on the constants.php file from the right side:
Step four: Now it'south time to edit the code to increase the Upload size limit. Become to line no 284, and you volition see Max File Size text. You lot need to add 536870912 * 20 from bellow to alter the upload size limit every bit shown below:
Here is how it will look similar subsequently changing the value:
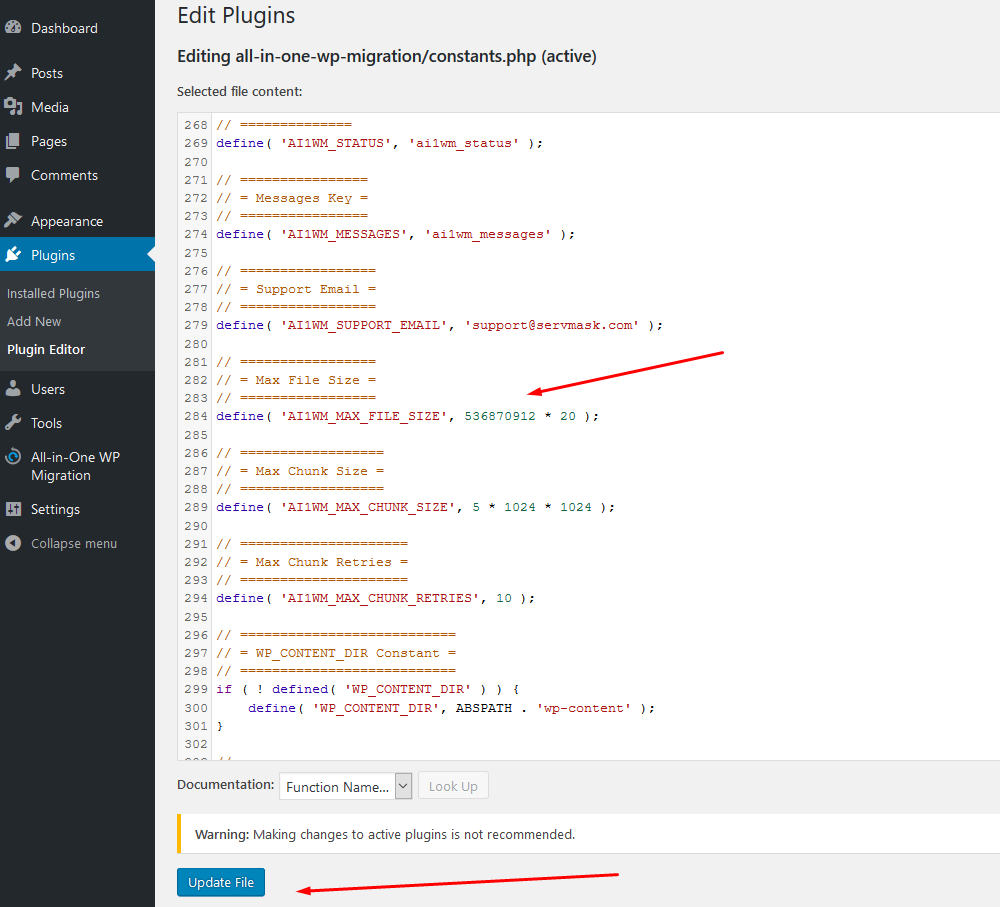
Stride 5: Now, you must click on the Update push button to salve the above actions.
STEP 6: Once saving is done, yous will be able to restore any backup size using the All-in-1 WP Migration plugin in WordPress.

If you did everything exactly every bit I showed higher up, then you will see that your upload limit has been increased as your provided value.
Tips for Advance User:
If you are an advanced user and have hosting admission, you lot can edit the All-in-One WP Migration plugin code from the hosting file manager. To edit All-in-One WP Migration plugin files, y'all need to get to: wp-content => Plugins => all-in-i-wp-migration/constants.php
If you need to exclude some files or folders from the All in All WP Migration plugin backup, please read my other article showing you how to exclude files and folders in the All in All WP Migration Plugin.
That's it. If you have whatsoever questions regarding the All-in-One WP Migration plugin or cannot solve the plugin upload size trouble, please permit me know by posting your annotate below.
Yous may check this top plugin to increase and optimize your WordPress website loading speed.
Wishing you the all-time of luck.
campbellpothead67.blogspot.com
Source: https://shameem.me/increase-upload-limit-for-all-in-one-wp-migration-plugin/
0 Response to "All in One Wp Migration Increase Upload Limit Plugin 128mb"
Enviar um comentário